
Updated 08/25/21
• More on cropping your image here – WTH VIDEO: https://blog.main.wattsdigital.com/how-to-crop-your-image-in-photoshop-cc/
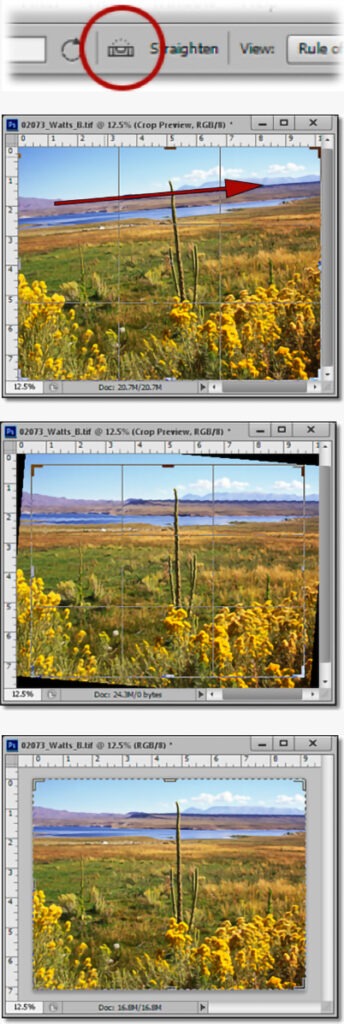
Is the horizon in your digital image not straight? If not, it can be very distracting. Here’s an easy way to straighten it in Photoshop:
1) Activate the Crop Tool & press the “Straighten” icon in the Options Bar. Clear the “Width, Height, & Resolution” values.
2) While holding down your left mouse button, draw a line along the horizon (or vertical) in your image.
3) When you let up off your mouse button, your image is straightened and cropped so that the Crop Box fills the image. If you need to reshape your Crop Box, do it now – otherwise, just leave it alone.
4) Commit to the Crop by pressing the “Commit” button (the “check mark”) in the Options Bar.
Viola! Your horizon is now straight! By the way, this technique works equally well if you need to straighten vertically, such as architectural photography.
__________
• Want to see Photoshop in action? Check out my “Photoshop 101” series of FREE online & live Photoshop Meetups – available nationwide:
https://wattsdigital.com/free-live-meetups-online
• Was this information helpful?
Sign up for my free monthly newsletter here …
• By the way, this is all based on my Photoshop book designed for photographers, “Not just another Photoshop Book”, available exclusively on Amazon:
https://www.amazon.com/dp/B07HNLS1Q2
Questions? Please contact me – also, feel free to comment and tell your photography friends!
Thx again, and cheers,
John Watts 🙂