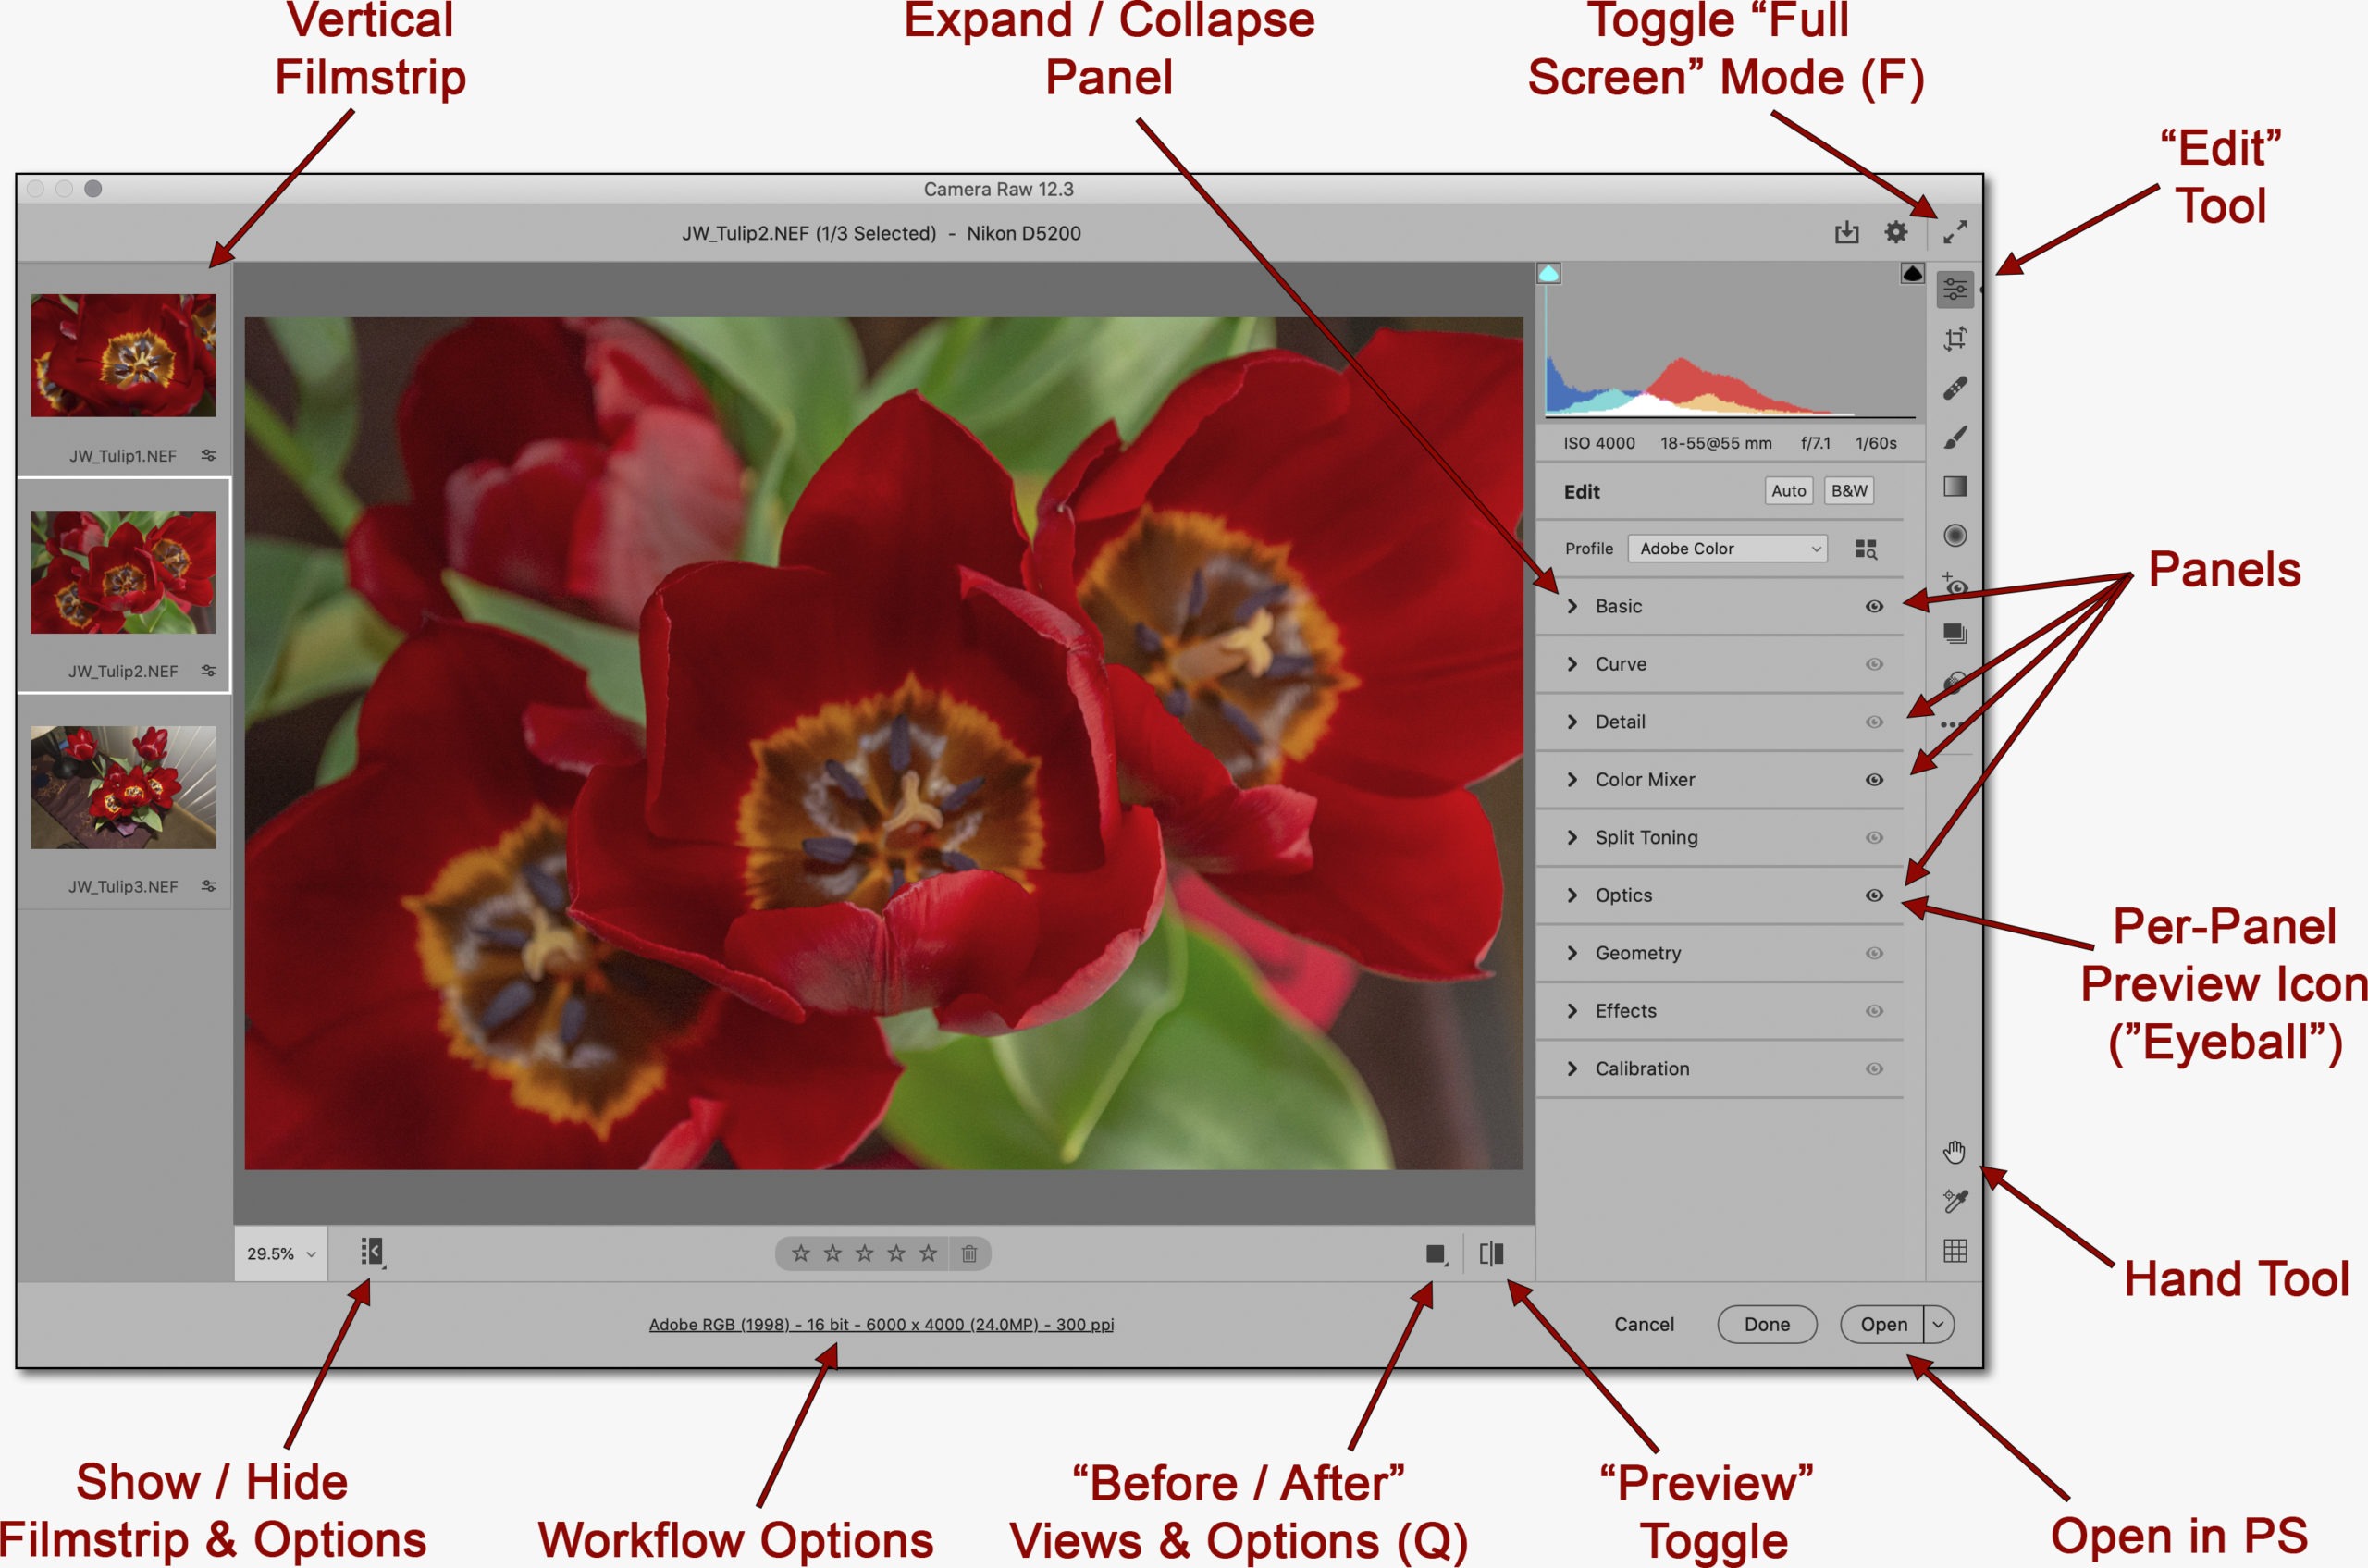
Updated 08/29/23- with Short YouTube Video:
__________________________
Psssst – also wanna see the Adobe Camera RAW
User Interface in action? WITH YOUTUBE VIDEO …
https://blog.main.wattsdigital.com/camera-raw-16-0-adobe-finally-gets-it-right-with-video/

One of the most misunderstood (and mis-used!) concepts in digital post-processing is how to properly work with RAW files.
What to do with all that digital information? How do you work with the format correctly & maximize your image’s potential?
When enhancing your image from RAW, what are the “Goals”, and why? What the heck are you even aiming for?
First, what is a RAW File?
A Camera RAW file contains unprocessed, uncompressed 16 bit data from your digital camera. It’s just information, but lots of it. It isn’t really a file “format”, like JPG or TIFF. It also doesn’t have a Color Space.
You should be shooting in Camera RAW for your important work — the results are worth it! The more information you are able to capture when you shoot, the more information you have to effectively create your image.
We’re focused on the “Philosophy of RAW” in this post, to give you direction. For more valuable information on RAW “by the numbers”, click here: Why shoot in 16 bit (RAW), rather than 8 bit (JPG)?
What is the INCORRECT way to work with a RAW file?
So, why not just use a few sliders willy-nilly to make my image “nice-looking”, either in Photoshop’s Adobe Camera RAW plug-in (ACR), or in the Develop Module in Lightroom?
You can try, but by doing so, you’re cheating yourself of all of the available digital information, which you can use to your advantage in Photoshop – and more digital information in your file (within the visible spectrum) is a very good thing!
Keep in mind that Photoshop & Lightroom are two totally different programs, with two totally different purposes – more here: Photoshop vs Lightroom? Wrong Question!
What is the CORRECT way to work with a RAW File? What are the Goals?
Here’s where the “Philosophy Of RAW” comes into play – – Set Goals! There are 4 individual goals – the “Overall Goal” is to bring your final RAW image into Photoshop:
• Slightly Dark or Under-Exposed – – It’s easier to lighten in Photoshop …
• Slightly Low or “Flat” in Contrast – – It’s easier to increase your contrast in Photoshop …
• Slightly Over-Saturated – – It’s easier to de-saturate in Photoshop …
• Best Overall Color Balance – – You can “fine-tune” individual areas in Photoshop …
Why these four “Goals”, you ask?
• Following these four “Goals” will bring LOTS of information from your digital capture into the “visible spectrum” (and hence your Master File in Photoshop).
• Further, it provides “headroom”, or a “margin of error” – it’s always better to have more information than not enough, and information is king in post-processing.
Keep in mind that by using these four “Goals” your aim is NOT to make a perfect image in ACR (which is what most people try to do, including Lightroom users in the “Develop” Module – and you simply can’t – see PS vs LR link above) …
By using these four “Goals”, you’ll take advantage of the strengths of both ACR and Photoshop in your overall workflow to end up with your final desired “killer” image (via your Master File – see link below).
• What are those strengths? ACR is designed to get as much digital information as you can out of your digital capture, and Photoshop is the industry standard in using that information for the best possible (and most flexible) results.
• While it’s true that you’ll spend a bit more time in your overall Photoshop Workflow by shooting in RAW, it’s really not that much more – you’ll probably spend a lot less time in Photoshop by spending a few more minutes in ACR first – and the results are truly worth it!
More on Master Files here: What is a Master File, and why do I need one?
The Histogram & the “Visible Spectrum” of Light:
The Histogram shows those pixels brought into the “visible spectrum” of light from your original “bucket” of RAW Capture.
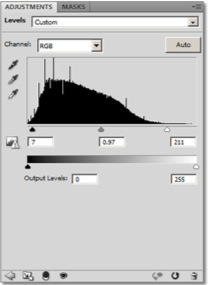
 • By bringing your file from ACR into Photoshop following the four “Goals”, your histogram in Photoshop should reflect it (depending on the subject matter, of course), with a bias of extra pixels to the left-hand side, similar to the Levels Dialog Box shown – slightly underexposed, with plenty of “headroom” (room for adjustment), particularly in the highlights.
• This will bring pixels from your RAW capture into the “visible spectrum” of light, and avoid digital “clipping”. By the way, this concept is called “Expose to the Left” (internet search here).
If it was good enough for Ansel Adams, it’s good enough for me …
Ansel Adams was not only a ground-breaking photographer, but he helped re-define what to do with your image AFTER you’ve shot it (“post-processing”). By doing so, he was a pioneer in turning printed photographs into an art form.
Using the Zone System, Adams and his contemporary Fred Archer were famous for exposing & chemically processing their negatives so that they were slightly low in contrast & slightly under-exposed, which resulted in more detail in the highlights as well as the shadows – just like 2 of the “Goals” stated above (the other 2 goals are exclusive to color images).
Think of adjusting your RAW file in the same way – but instead of using a negative & chemistry like Ansel Adams and Fred Archer did, we’re processing our RAW File (the ”negative”) using Adobe Camera RAW (the “chemistry”).

“Moonrise, Hernandez, New Mexico”
from anseladams.com
• Original Negative: Using the Zone System, the initial capture is slightly underexposed, and retains detail in the highlights & shadows (low in contrast) – think original RAW Capture.
• Contact Sheet: The contact sheet reveals the low-contrast nature of the original capture & chemical processing technique – think “first look” in Camera RAW.
• Initial Print: Although low in contrast, the initial print shows all sorts of detail in the highlights as well as the foreground – think “after adjusting” in Camera RAW.
• Final Print: This famous print shows how much can be done with the original capture, truly giving it that majestic “pop” – think “after adjusting” in Photoshop.
“Modern Day” Examples:
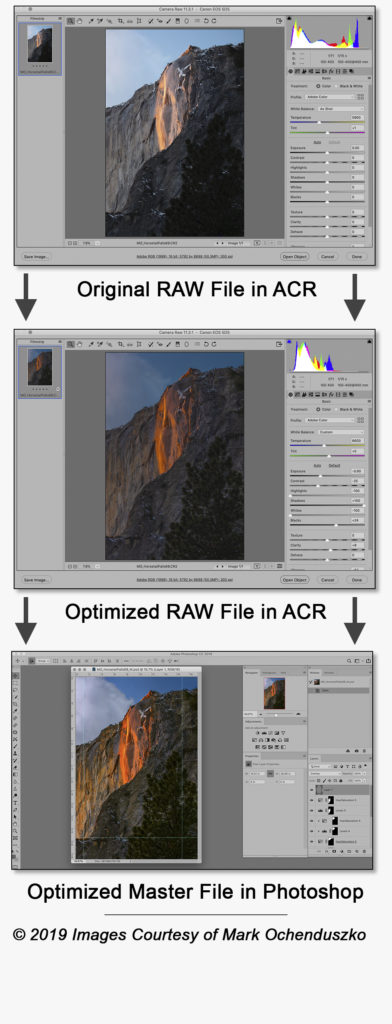
If a picture is worth a thousand words, then this series of screen grabs of two different images will visually show you the evolution from the Original RAW Capture, to the Optimized RAW file, to the Optimized Master File in Photoshop (click on image to zoom in) – and many thanks to Stephanie Rudd & Mark Ochenduszko for allowing me to use their beautiful images:


______________________________
• AVAILABLE NATIONWIDE – for more on my free live & online Photoshop Meetups, click here:
https://wattsdigital.com/free-live-meetups-online
• More Photoshop videos at my YouTube Channel:
https://www.youtube.com/user/wattsdigitalvideos
• Was this information helpful?
Sign up for my free monthly newsletter here …
• By the way, this is all based on my Photoshop book designed for photographers, “Not just another Photoshop Book”, available as eBook (immediate PDF download) or paperback from Amazon:
https://wattsdigital.com/photoshop-book-e-book
Questions? Please contact me – also, feel free to comment and forward this to your photography friends!
Thx again, and cheers,
John Watts 🙂
