Updated 03/01/22
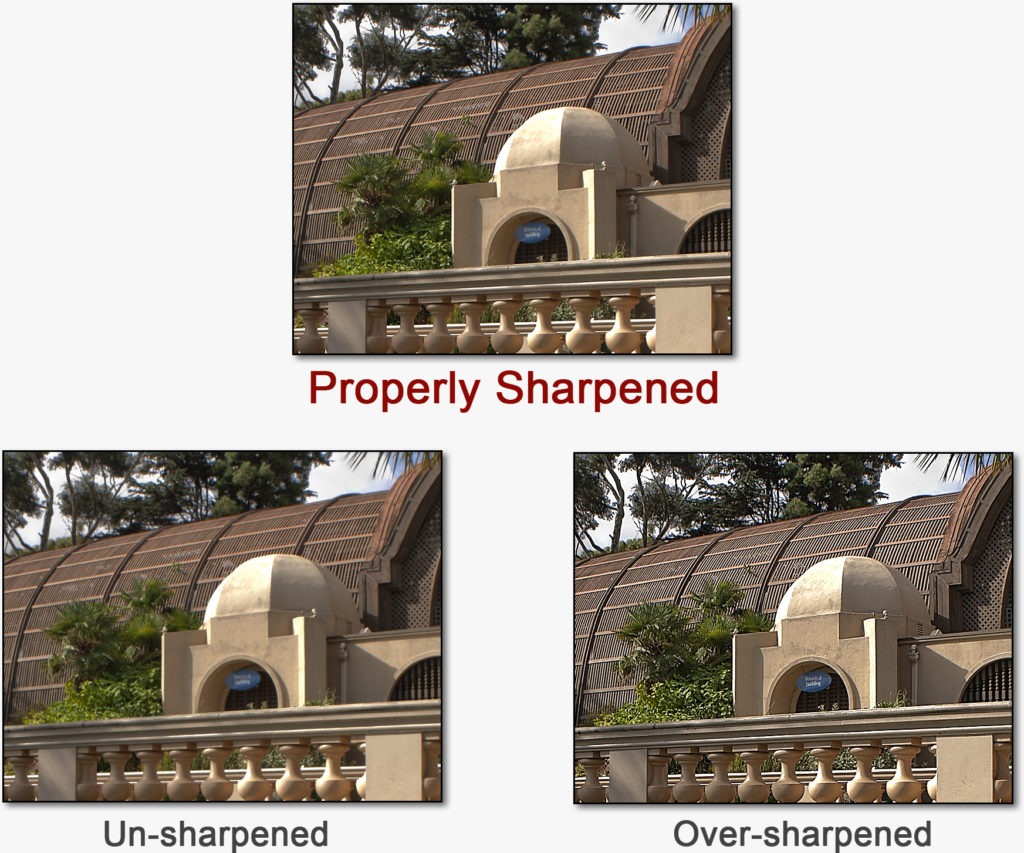
NOTE – For maximum clarity, you can zoom in on (or download) any image in this post!
For best results, maximize your browser, then click on the desired image – navigate as needed.
Having challenges getting your image sharpened properly in Photoshop? Try using this technique, rather than the generic Sharpening tools, which are not as effective and prone to over-sharpening – it’s also much harder to accidentally over-sharpen your image, and gives incredible results.
This is a “non-destructive” technique, which means it will minimize throwing out unnecessary pixels. Without getting into total “propeller-head” mode, it simply sharpens only the “Luminance” values of your image, but NOT the Hue and Saturation values, resulting in a much better end result.
By the way, as we discuss it below, don’t let the term “Unsharp Mask” throw you for a loop – it really does sharpen your image! The term’s just a carryover from the analog / film days.
Purpose:
Sharpening your images shows more detail and enhances focus in your image. Due to failures in digital technology, which tend to introduce “softness” into your images, it’s usually necessary to apply some sharpening to get the absolute most out of your printed image.
When to Use:
Sharpening is one of the last things that you’ll do to an image: You should never sharpen your Master File (more on Master Files here). The amount of sharpening that’s necessary for a 16×20 is more than it would be for an 8×10 – – If you sharpen your Master File for a 16×20, your 8×10 will be over-sharpened. It’s best to sharpen a duplicate file of your Master File for the intended output size.
Selectively Sharpen:
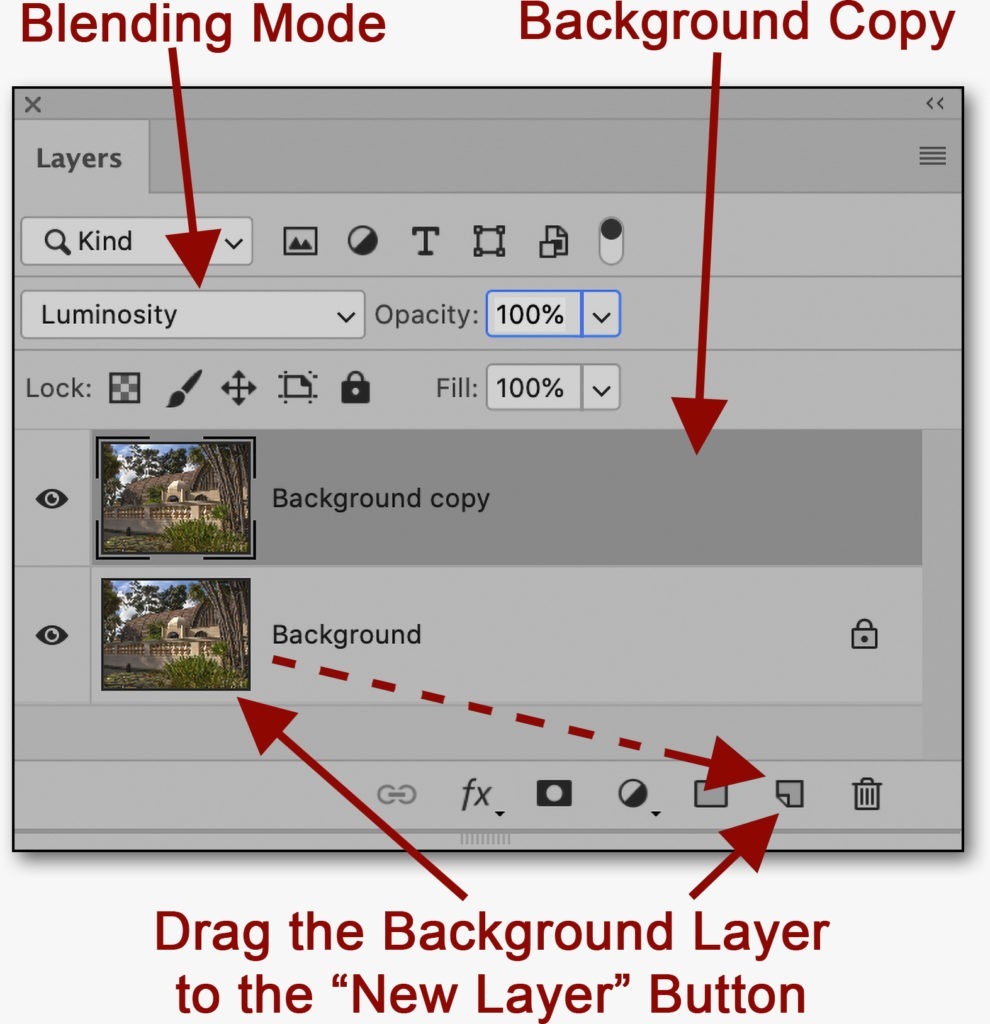
The method that I’m showing you involves creating a Background Copy (it’s easy – see below). You can then selectively sharpen just part of your image by creating a Layer Mask on the Background Copy, and “painting out” those areas you don’t want to sharpen (MUCH more on the power of Layer Masks in my book, “Not Just Another Photoshop Book”, available on Amazon).
 How to use “Unsharp” Mask:
• Step 1 – Create a New Background Layer Copy: To create a Background Copy, simply drag the original Background Layer to the “New Layer” button.
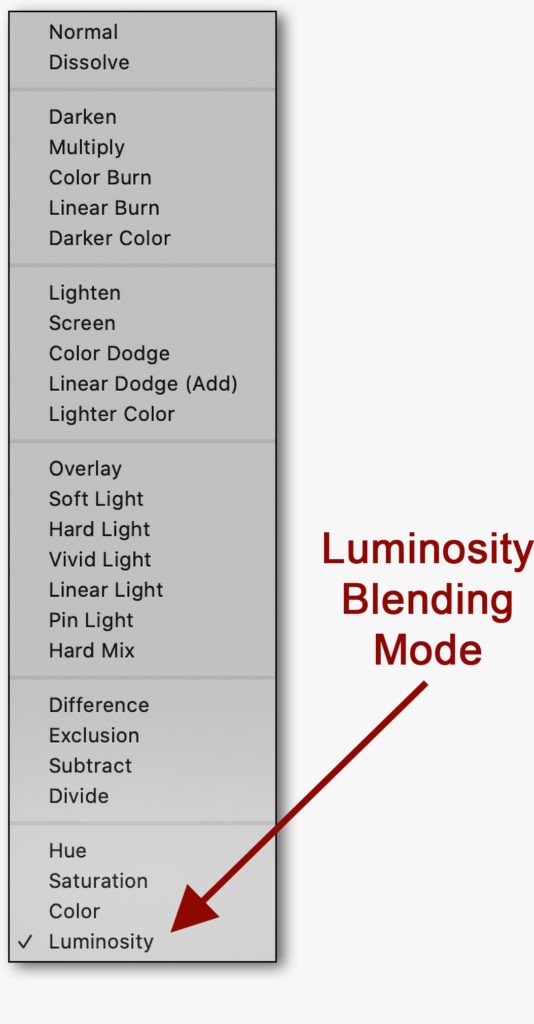
• Step 2 – Change the Blend Mode: Make sure that your Background Copy is highlighted (as shown), then change the Blending Mode to “Luminosity” from the drop-down menu.
• Step 3 – Go to “Filter” menu -> “Sharpen” -> “Unsharp Mask…”: This brings up the Unsharp Mask Dialog Box. (see below for more on this)
• Step 4 – Apply the proper amount of “Unsharp Masking” (more on this amount in a minute) – – Click“OK”
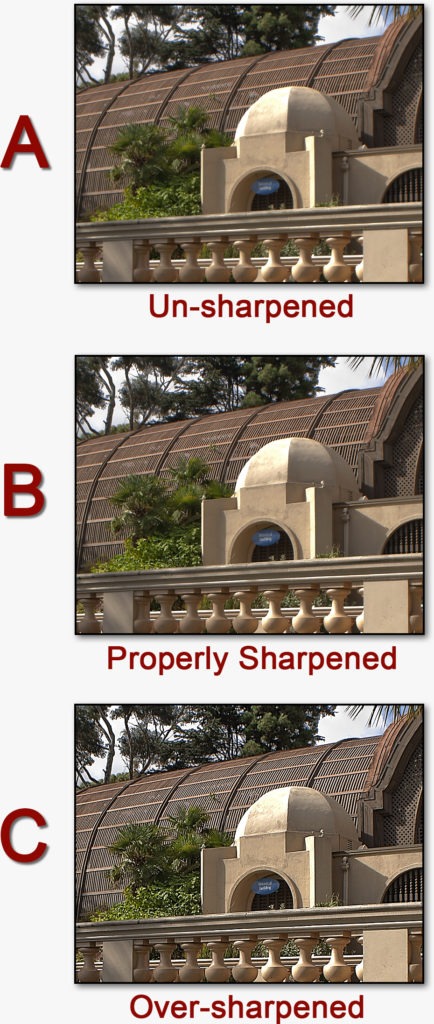
Here’s a zoomable example to the bottom right:
• In Example A, There is no sharpening at all – this is what came out of the camera. The lack of sharpening is most noticeable in the palm tree left-of-center, the slats in the roof, and the unreadable blue sign above the arch.
• In Example B, The sharpening is just right – not too soft or too harsh, you can see detail in the palm tree and slats – plus, you can read the lettering in the sign.
• In Example C, the image is over-sharpened and harsh-looking, to the point that the palm trees have “halos”, the slats have a “rough” & “crunchy” look to them, and the corners of the stucco look fake.
Some pointers to get started:
• Suggested starting points in the Unsharp Mask Dialog Box are:
• Amount = 50 to 200
(the bigger the enlargement, the more sharpening you’ll need)
• Radius = .9 to 1.2
• Threshold = 2 to 3.
The vast majority of the time, I leave the Radius at 1.0,Threshold at 3, and I’ll increase the Amount until it looks over-sharpened, and back off a bit. Also, I can always back off the opacity of the layer.
• How much is too much? (Don’t forget to see the “zoomable” sample to the right!) Mostly you’ll have to rely on a bit of trial and error at first, but the trick is to keep things looking natural and not too intense – you’ll gain more experience at this as time goes on.
By the way, if your image isn’t fairly sharp to begin with, I wouldn’t expect Photoshop to correct it completely –when it comes to sharpening, it’s not a miracle program.
Unsharp Mask Dialog Box:
• You can “preview” your sharpening in the Preview Window in the Unsharp Mask Dialogue Box by holding your cursor over it (the cursor changes to a “hand”), then pressing your left mouse button – pressing it and holding it down is the “before” view, releasing the mouse button is the “after” view.
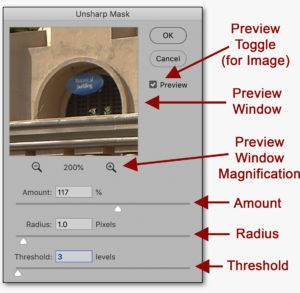
• You can also put the cursor in the Preview Window, press and hold down the “Space”bar on your keyboard, press and hold down your left mouse button, and drag the view of the preview pane to a more desirable location.
• With the Unsharp Mask Dialogue Box open, you can put the mouse cursor in your actual image (a small square “box” will show up as your cursor), place it over an area that you’d like to see in the Preview Window, and left-click: Voila! That area shows up in the Preview Window.
How to view your image for proper sharpening:
• I normally judge the effects of my sharpening with my image at a 1:1 magnification (expressed as a percentage), as shown in the Document Window of your open file – this is “actual size” (or close to it) for a print on my monitor if the image resolution is 300 PPI.
• To determine this, turn on Photoshop’s “Ruler” (“View” menu -> “Ruler”), hold a physical ruler against your monitor, then zoom in or out on your image until an inch on your image equals close to an inch on your physical ruler – the magnification shown in your Document Window of your open file is your “1-to-1” viewing magnification, expressed as a percentage.
For most monitors, this will be 25% magnification, but on some higher-resolution monitors, it can be much higher (it’s 66.7% on my MacBook Pro 2015 Retina Display).
• I’ll also set the Preview Window in the Unsharp Mask Dialogue Box at about twice my 1:1 magnification (default is 100% – press the “plus” or “minus” symbols to change the value) – – as an example, if my 1:1 magnification is 25%, then I’d set the Preview Window magnification at 50%
• Between the two views / magnifications, I get a real good feel for how the final image is going to look once sharpening is applied.
• Use the “Preview” check box to judge the effects of the sharpening in your image in Photoshop (This does not “preview” in the Preview pane).
_____________________
• AVAILABLE NATIONWIDE – for more on my free live & online Photoshop Meetups, click here:
https://wattsdigital.com/free-live-meetups-online
• More Photoshop videos at my YouTube Channel:
https://www.youtube.com/user/wattsdigitalvideos
• Was this information helpful?
Sign up for my free monthly newsletter here …
• By the way, this is all based on my Photoshop book designed for photographers, “Not just another Photoshop Book”, available as eBook (immediate PDF download) or paperback from Amazon:
https://wattsdigital.com/photoshop-book-e-book
Questions? Please contact me – also, feel free to comment and forward this to your photography friends!
Thx again, and cheers,
John Watts 🙂
